ICF Roof of the Ventura-Gutek House and Studio

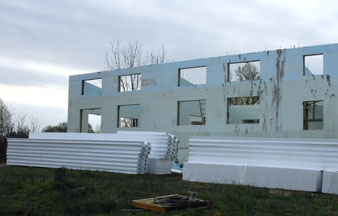
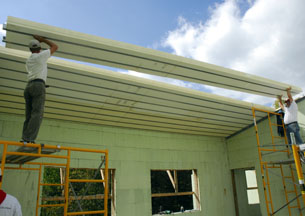
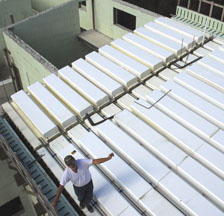
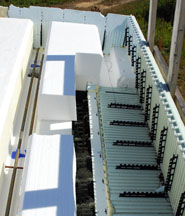
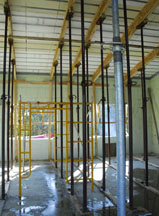
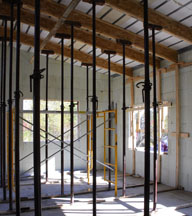
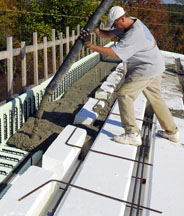
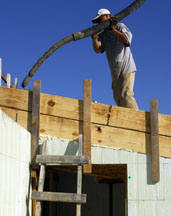
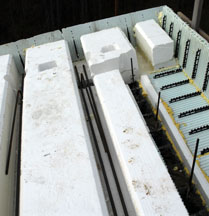
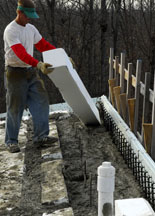
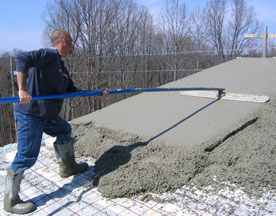
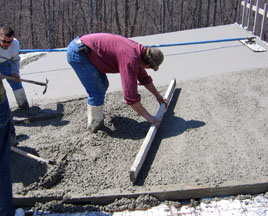
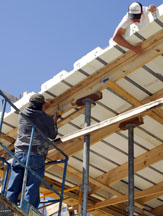
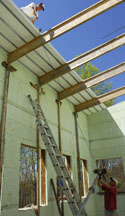
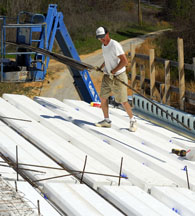
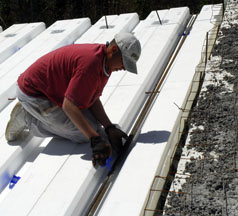
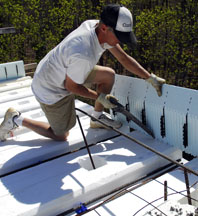
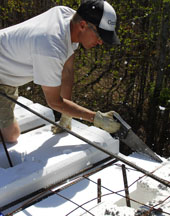
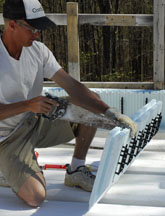
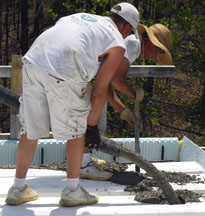
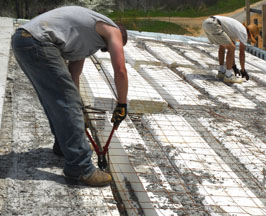
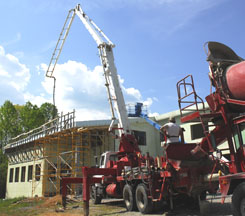
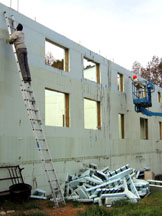
A sloped ICF roof will help make the house energy efficient and strong, tying together the walls. Since the supplier had no experience with a sloped roof or with overhangs, Larry figured out how to install the panels and the overhang through experimentation. The expensive drawings that the supplier required before selling us their product (from an engineer of their choice) had errors and offered several impractical solutions.

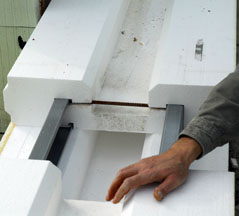
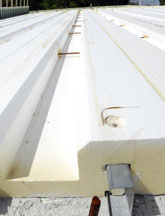
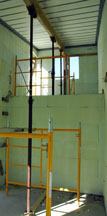
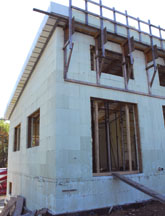
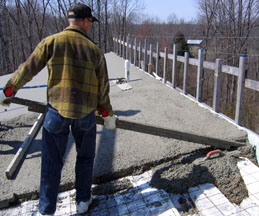
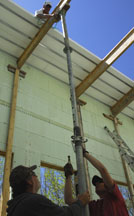
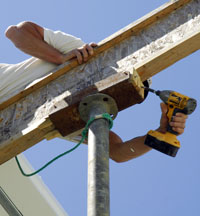
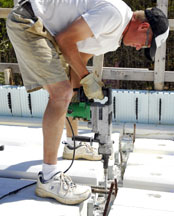
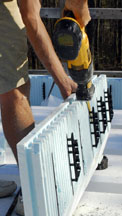
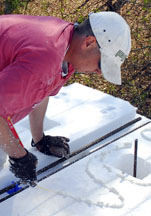
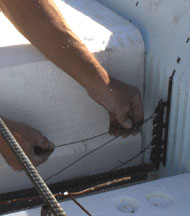
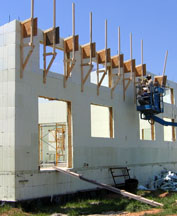
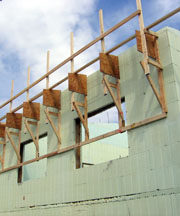
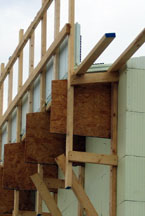
Wood will support the upper and lower 18" ICF overhangs until the concrete work is finished.


The ICF roof panels are composed of several 8' (or shorter) sections of hot-wire cut foam pieces that are slid onto two 18 gauge metal studs; screws are placed at each end to hold the foam in place. Before putting the panels on the roof, we unscrewed the ends, slid the sections apart and inserted 13 1/4" long rebar between the studs where each section joins section to anchor the studs (to avoid the tear-out that sometimes happens after sheetrock has been installed).

Twenty gauge L track was screwed to the top perimeter of part of the room. ICF roof panels (ordered with the studs extending 2" on each end) were then set onto the walls (that are filled to the top with concrete). Chris screwed on more L track with self-drilling screws and then screwed the panels to it. At first the crew concluded that it would be easier to add the L track after placing the panels because too much time was wasted measuring beforehand - later they realized that it wasn't necessary to use L-track along the perimeter because the metal studs supported the edges OK. The picture on the right shows the ends of the studs resting on the concrete wall and the rebar reinforcements that we installed. An 8" high foam "tophat" will be placed on the high part of each panel to increase the size of the poured beams.

The roof was completed in 4 sections. Most of the top hats are in place in these pictures. ICF block panels created the overhang on the top and bottom of the slope. The ends of the roof panels formed the sloped overhang and needed no extra support because of they included metal studs. ICF blocks formed all the vertical edges of the overhangs (a string should have been stretched to perfectly align the top edges to assure that they were straight because the wavy perimeter caused a lot of problems when the rubber roof and overhang were installed).

The ICF roof panels were supported with wooden I-beams that were held in place with 2 x 4's screwed to the walls, metal shoring (topped with wooden wedges that match the slope), and more 2 x 4's on the floor that distributed the weight during the pour. It's best to support the panels up the slope as shown so that the I-beams can rest perpendicular to the metal studs in the panels. This top inner wall with studs, panel ends, top hats and rebar will be secured with cement.

Rebar was lifted up and then 2 were placed in the bottom of each beam on plastic "chairs". The beams and part of the overhang were poured first (the top slab will be poured later). Two more rebar were pushed into the top of the concrete after each beam was poured and L-shaped rebar was pushed into the concrete on the overhang.

Another roof section will join the part seen above. A vibrator should have been used at every step of the roof pour - especially when the beams were poured - to eliminate air pockets. The beams were partially filled, more rebar was placed, then they were covered with more concrete. Concrete was removed from the top hats and short rebar was inserted vertically into the concrete to prepare for the next pour. This is the top corner of the roof with the overhang. For support and to connect the wall to the roof, 6" holes were cut into the bottom of each roof panel "beam" where it rested on the wall and in the middle of the high section over walls that were not previously poured to the top. Concrete was poured onto the overhang, rebar was inserted, then a top hat was pushed into the wet concrete. The top layer will be poured another day.

Beginning at the top, the concrete slab was poured, leveled, then smoothed with a float in sections. Two 2 x 4's screwed together help maintain the 3" thickness. Again, a vibrator should have been used and care should have been taken around the edge of the roof. The rough, uneven surface of the roof was later ground down, but it was never as smooth as it should have been, causing lots of problems installing the wood around the edges during the rubber roof installation.

The roof panels of the last section to be poured were set into place from the bottom of the slope towards the top, then screwed to the shoring for security.

Daniel pulled up the top of the pole shoring with a rope to set it upright, then Ryan adjusted the height of the pole while Larry checked the level. Daniel then secured the top to the I-beam with screws.

Daniel placed 2 pieces of #5 rebar into the depressions, while Ryan slipped rebar supports underneath to raise and keep them in place during the pour. Daniel drilled holes into the top of the concrete wall to insert more rebar.

Daniel marked the thickness of the end panel on the ICF roof panel with a saw. Although regular block panels should have been used, he selected pieces that needed to be "used up" (this one was originally designed for a brick ledge). The end of the roof panel was then cut to hold the end panel. Daniel then cut out sections of the block panel so that it could fit around the metal studs of the roof panels.

Foam was sprayed on all the joints, then the panel was set in place. Ryan sprayed foam over the roof panel to glue on the top hat while Daniel cut off some of the black supports (so that it could fit snugly against the top hat). Wire was used to tie the panel to the rebar for further security.

While Ryan filled the top 2' of the walls (under the roof panels), Daniel moved a pole up and down to remove air bubbles. Six by 6" wire mesh was laid on top and connected every 6' to keep it in place, then the rest of the beams and the slab were poured and smoothed.

Link to slab construction.
Link to ICF wall construction.
Link to construction of second floor.
Link to construction of walls of second story.
Link to stovepipe installation.
Link to insulated rubber roof installation.
Link to the window and door installation.
Link to steel framing.
Link to steel stairs installation.
Link to brick laying.
Link to overhang installation.
Link to gutter installation.
Link to electrical work.
Link to plumbing installation.
Link to septic tank installation.
Link to sheetrock/drywall installation.
Link to mudding / sheetrock finishing.
Link to painting of the walls and ceiling.
Link to the installation of the floor tile.
Link to the installation of the flexible solar panels.
Link to the installation of the exposed aggregate driveway.
Back to the ICF main page.

Web page, text, and photographs by Carol Ventura in 2007.