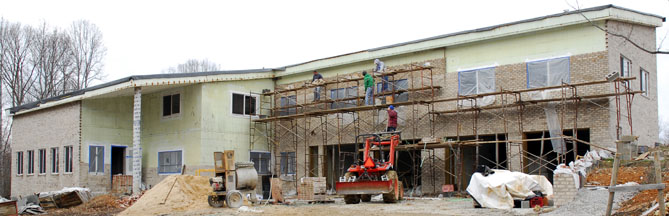
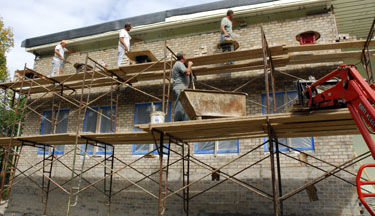
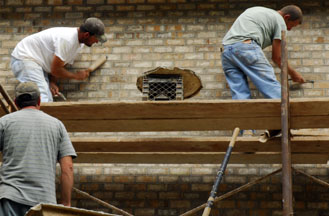
| Gib Jolley and his father, brother, cousin, son and 2 unrelated coworkers laid the queen-sized brick (which is taller and thinner than regular brick, but more expensive to lay). They began at the lowest level, then worked their way up and around the house in sections. Painter's tape secured 4 mil plastic to the windows to protect them from falling bricks and the mortar. |
 |
 |
 |
 |
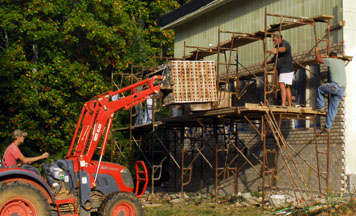
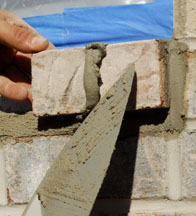
| Brad Jolley loaded the brick on the scaffolding with a tractor. A string stretched between two angle irons (marked with adjustable pencil lines) assured that each course was straight and plumb. The level of each course was adjusted to accommodate the window height. A thick layer of mortar (water mixed with 3 parts sand and 1 part type N mortar - type S would have been stronger) covered the top of the previous course, then the right end of a brick was mortared, set in place, the height was adjusted, then excess mortar was removed with a trowel. A 2" x 4" temporarily supported the angle iron over the window until the mortar was completely set. | ||
 |
 |
 |
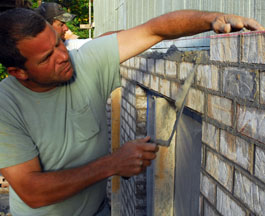
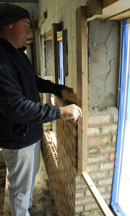
| Around six vertical feet of brick could be laid in a day. More than that was too much (the heavy bricks and soft mortar could produce a bulge in the wall). Gib laid a course while his father (Big Gib on the right) carefully set a cut brick in place next to a window. | ||
 |
 |
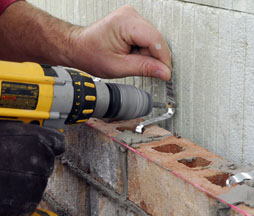 |
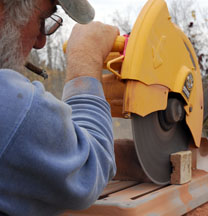
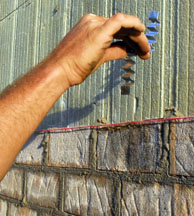
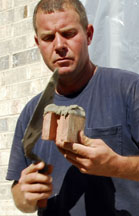
| Larry Jolley cut the brick with a rotating diamond blade. | After a few courses were laid, metal ties were bent, stuck into a hole in the brick, then screwed into the plastic inserts of the ICF wall (at the vertical indentations) every few feet to help stabilize the wall. | |
 |
 |
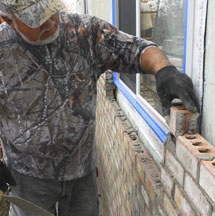
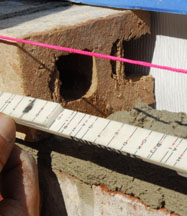
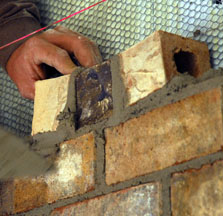
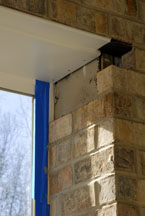
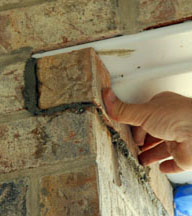
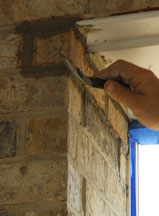
| The bottom of the steel lintel was covered with vinyl, then it was set in place. The narrow queen sized brick forced the lintels to be placed narrow side down, so the vinyl covers had to be cut since they were designed for the wide side of the metal lintels. The supporting bricks were cut to allow the lintel to be placed onto the window's brick molding. | |
 |
 |
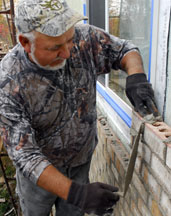
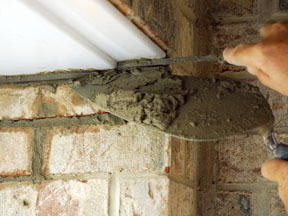
| Carl passed up the mortar with a shovel from a metal container that the tractor placed on the scaffolding. Gib smoothed the joints with a concave jointer after the mortar has set for a few hours, then Tim Jolley wiped the surface with a foxtail brush. | |
 |
 |
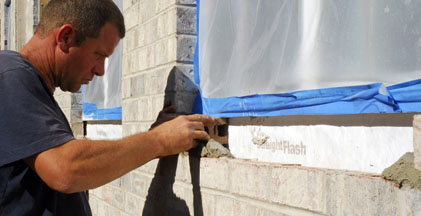 |
| Window sills were set as the scaffolding came down to protect them from falling mortar and dropped bricks. The brick was cut to size, the side was buttered (covered with mortar), then it was set in place (sloping downwards to shed the rain), beginning with the right and left sides. | ||
 |
 |
 |
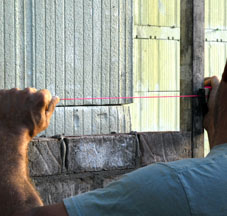
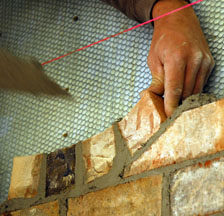
| A string was not always used, but when utilized, it was held taught and level with concrete nails. A masonry ruler helped determine the spacing of the bricks. Gentle taps with the trowel handle help angle each brick. | ||
 |
 |
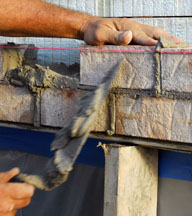
| Gib used the ruler several times to gauge the thickness of the mortar. After they were all laid, he finished the joints with a concave (round) jointer. | |
 |
 |
 |
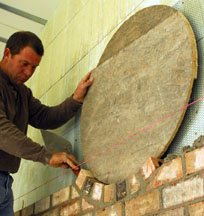 |
| A wooden template was made from 2 overlapping pieces of wood that were screwed together (to make it easy to remove once the brick circle has set), then steel mesh was screwed into the plastic inserts of the ICF block (so that a glass mosaic may be added later). Bricks were cut to size then set, beginning at the center bottom. | |||
 |
 |
 |
 |
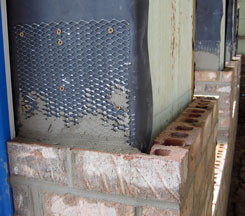
| The back of the bricks were cut to line the sides of some of the windows that didn't have enough room for whole bricks. These thin bricks were set with mortar onto metal mesh that was attached with screws to a waterproof surface - in this case - rubber left over from the roof was stapled around the wood rough openings. Only around 7 courses could be set each day. Temporary wooden braces kept the upper courses plumb. | |||
 |
 |
 |
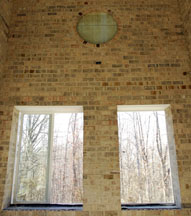 |
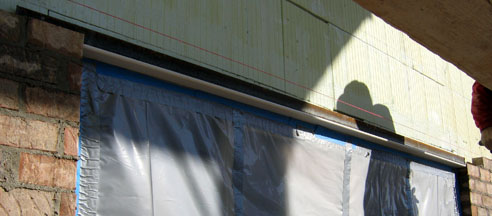
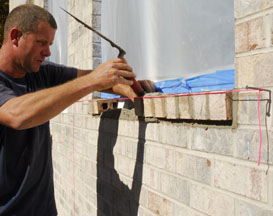
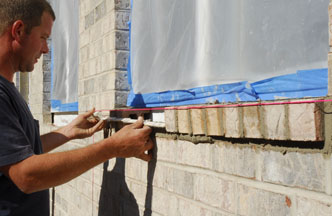
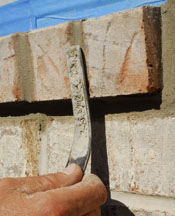
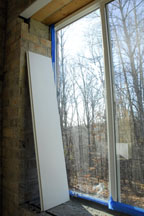
| A PVC board was cut to size, the lip was routed, then it was glued and screwed to the top inside of each window before the brick was brought all the way up. See how the top was finished below. | |||
 |
 |
 |
 |
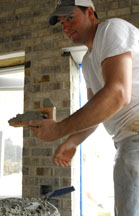
| Scott buttered a specially cut brick, then pushed it into place. After adhering all the other brick pieces with mortar, he used a tuck pointer to add mortar where it was needed, then finished the joints with a concave jointer. | |||
 |
 |
 |
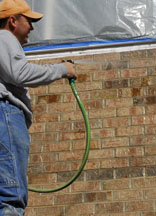 |
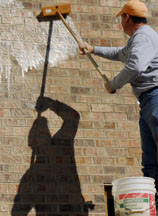
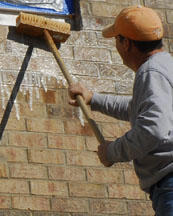
| After the mortar dried for a few days, Scott sprayed the wall with water, then scrubbed it with a coarse brush that was dipped in an acid wash solution. He removed bits of stubborn mortar with the back of the brush and rubbed stubborn spots with another brick, then rinsed the wall again with water. | |||
Link to footer and slab construction.
Link to ICF wall construction.
Link to construction of second floor.
Link to construction of walls of second story.
Link to ICF roof construction.
Link to stovepipe installation.
Link to insulated rubber roof installation.
Link to the window and door installation.
Link to steel framing.
Link to steel stairs installation.
Link to overhang installation.
Link to gutter installation.
Link to electrical work.
Link to plumbing installation.
Link to septic tank installation.
Link to sheetrock/drywall installation.
Link to mudding / sheetrock finishing.
Link to painting of the walls and ceiling.
Link to the installation of the floor tile.
Link to the installation of the flexible solar panels.
Link to the installation of the exposed aggregate driveway.
Back to the ICF main page.
Web page, text, and photographs by Carol Ventura in 2008.