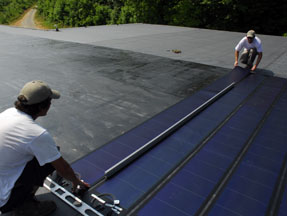
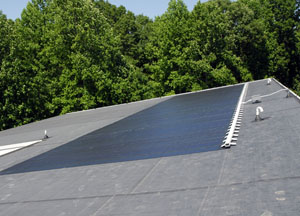
| LightWave Solar Electric installed a 7.2 KW system consisting of an array of fifty 18' x 15.5" Uni-Solar PVL-144 laminated panels, one SMA SB7000US inverter, one Sunny Island with a battery backup, and a SunnyBoy web box for monitoring the electricity generated by the system online. We didn't want penetrations into the rubber roof, so the peel and stick array (that was actually designed for metal roofs) was perfect for this application! How was it installed? Just take a look below. | ||
 |
 |
 |
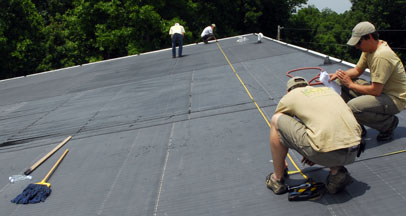
| Erik Stefans mopped the rubber roof while Jason Campbell sprayed it with water to remove dust and debris. | Erik and Rhodes Thompson remeasured the area with a metal tape . . . | . . . then Rhodes and Jason mark the perimeter with a chalk line. |
 |
 |
 |
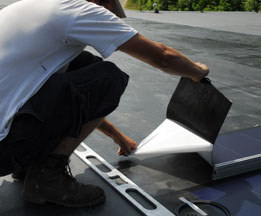 |
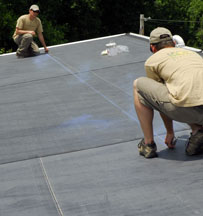
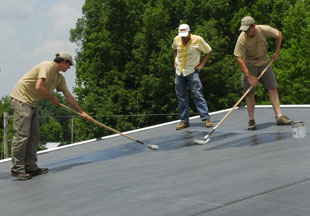
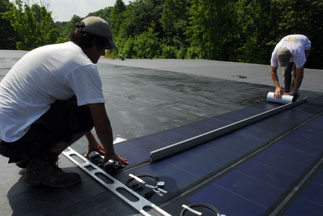
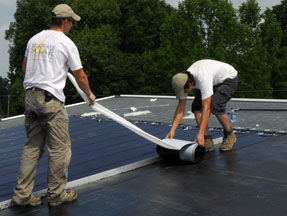
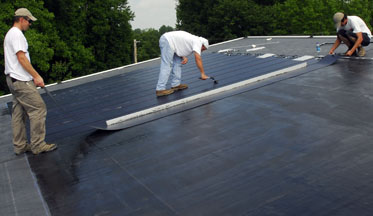
| Miles McCrickard supervised while Jason and Rhodes rolled GenFlex GenPrime onto the roof where the panels would be placed. Panel installation began on that end. | A straight edge on the top of the slope and a metal spacer next to the panel just glued down helped line up each panel. Each panel was first set in place, then the white backing was removed. The backing would not peel off when it was too hot, though, so they were installed during several morning before the roof heated up. | After Eric and Rhodes lined up the panel, Eric removed the backing from the top end . . . | |
 |
 |
 |
| . . . then carefully stuck it to the roof. Rhodes rolled up the rest of the panel, then slowly unrolled it as he pulled off the backing and laid the panel in place along the metal spacer. Eric walked on the panel while Miles pushed it down with a hard roller to remove air pockets and firmly press it in place. | ||
 |
 |
 |
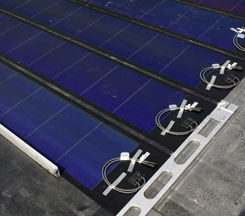
| The connections were run through a PVC wire troth that was glued to the roof. | ||
 |
 |
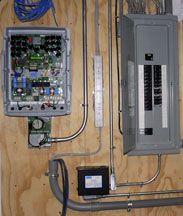 |
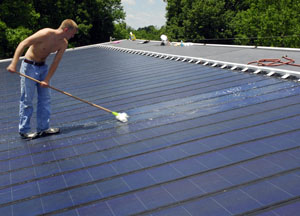
| Dan Stroh washed the surface with mild soap, then the wiring was connected to the SunnyBoy (open) in the utility room. The battery backup (for essential lights and plugs) was connected afterwards. | ||