Electrical Work of the Ventura-Gutek
ICF House and Studio
M & D Electric (100 Mill Drive, Cookeville, TN, 38501, 931 520-8847) did all the electrical and plumbing work. They
do both residential and commercial work, so they were the perfect fit for
our house, which is more like a commercial building. I was actually
dreading this step because we had major problems with many of our
other subcontractors, but M & D Electric was the best! They did thoughtful, quality
work and were always in a good mood.
|
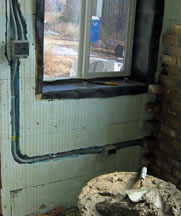
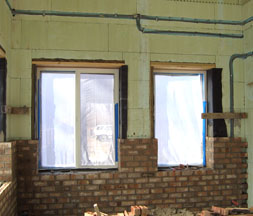
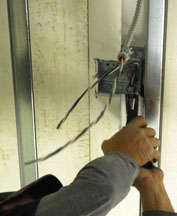
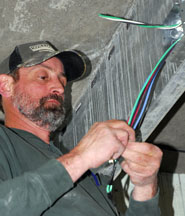
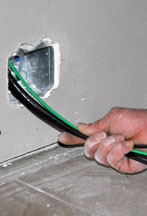
They installed conduit in the walls of the entry room because those
walls will be covered with brick. |
 |
 |
 |
 |
|
Conduit was installed in the interior walls to provide future access. |
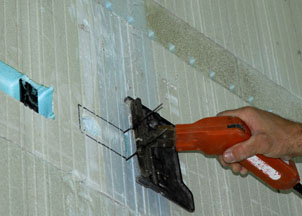
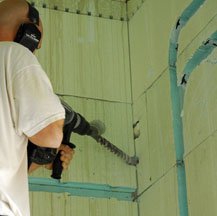
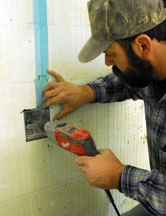
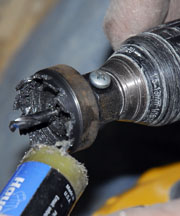
An electric rigid hot knife was set to the proper depth, then pulled though
the ICF to create the channels for the conduit. |
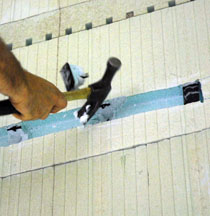
The top and bottom edges of the black plastic inserts were cut with a
reciprocating saw, then they were knocked out of the way with a claw
of a hammer. |
 |
 |
 |
 |
|
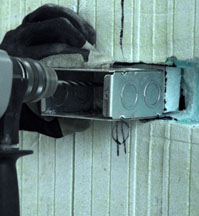
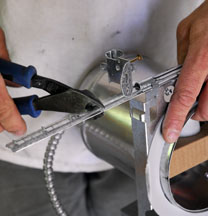
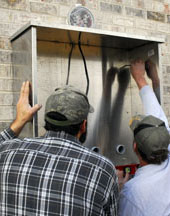
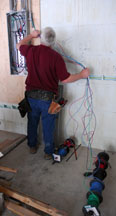
Cliff Gore drilled a hole into the metal brick box and then into the
concrete wall with a power
hammer, then screwed 1/4" x 2 3/4" Tapcons to secure the box the wall. |
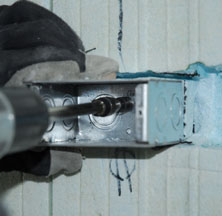
Cliff heated the 3/4" PVC conduit so that it could be bent. |
 |
 |
 |
 |
|
After rechecking the length, Cliff cut it. He then slid a PVC male
adapter through the knocked out hole of the box, added a plastic
bushing, then secured it with a metal lock ring. The conduit was then
glued to it. |
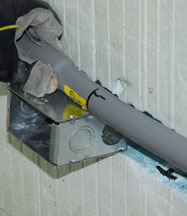
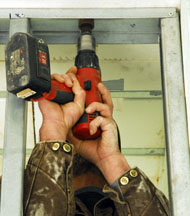
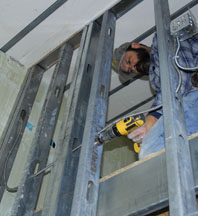
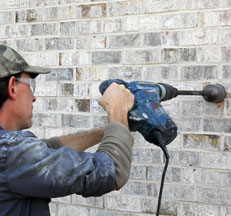
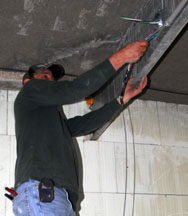
John Weatherly used a larger hammer drill to penetrate the corner of
the 6" concrete wall. |
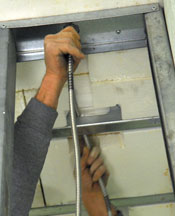
The conduit was secured to the wall with one hole metal straps every
10'. The wire will be inserted later, after the brick work. |
|
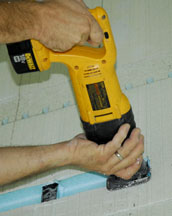
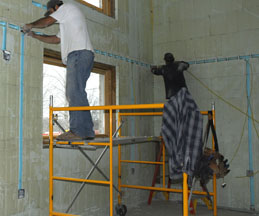
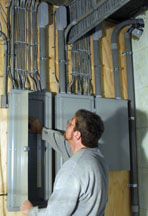
The rest of the house was wired with 12 AWG Romex and MC cable.
Channels and holes for the boxes were cut into the ICF with a hot knife
set to 2 1/8" deep, but the plastic strips
were left in place. A drill with a flexible shaft was used to remove the
foam from the back of the plastic strips to allow the wire to pass
through. The strips kept the horizontally run wire in place. |
 |
 |
 |
|
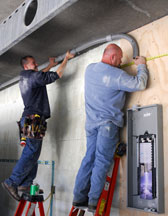
Mark Borch-Jensen screwed the boxes to the concrete with 1 1/4" x 1/4" Tapcon screws. |
Mark and
Tom Bos then pulled the Romex wire though the back of the plastic strips
of the ICF block. |
The Romex and MC cable and phone cable were run to the boxes, secured to the
wall and boxes, then raised covers were screwed to the square 2 1/8" boxes. |
|
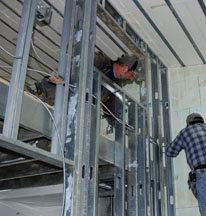
Metallic sheathed MC (Metal Conduit) cable was used with the steel framing because Romex
might rub and split against the sharp metal edges. |
 |
 |
 |
 |
 |
|
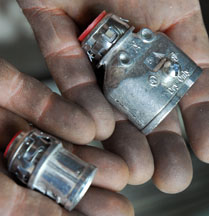
These MC connectors secured the wire to the electric boxes. |
The end of the outside of the cable was cut off with an MC splitter. |
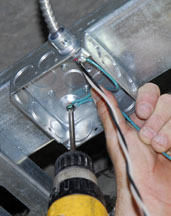
Metallic 4-square 1 1/8" deep boxes were screwed
to the metal ceiling joists, the wire was secured to the box with the MC
connectors, the green ground wire was screwed to the box, then a raised
cover was attached. |
 |
 |
 |
 |
 |
|
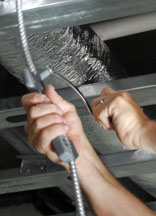
Tom lubricated the bit so that it effectively drilled a hole into the
18 gauge steel track. |
The center of the hole was removed, then MC cable was pushed through
the hole for a ceiling light. |
 |
 |
 |
 |
|
The ends of the cable were removed with an MC Splitter, the wire was
secured to the box, then the ground was attached to the box. |
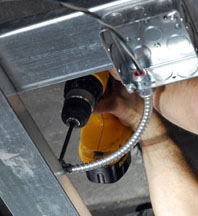
Mark lubricated a Hougen drill bit with a Slick Stick, then used it to
drill holes for the cable because the holes in the steel
studs did not line up. |
 |
 |
 |
 |
 |
|
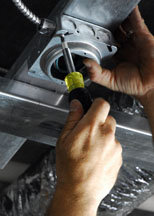
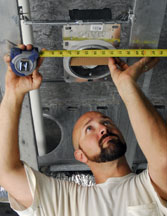
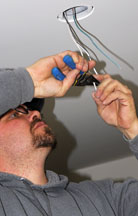
John fixed the span of the light can supports by cutting and
adjusting them to fit between the joists before screwing them in place. |
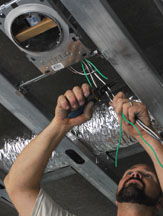
He then centered the can and screwed it in place. |
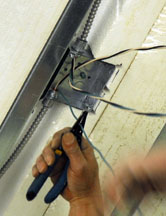
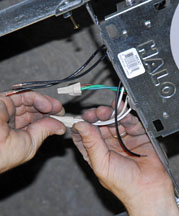
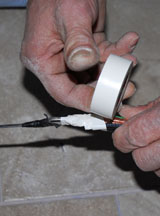
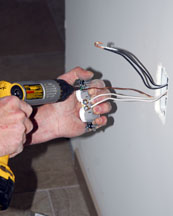
Then he removed the protective sheath from the ends with wire
strippers, joined like-colored wires, then twisted on wire nuts to
secure the connection. |
 |
 |
 |
 |
|
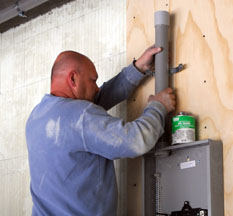
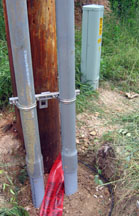
Kelly McCully drilled a hole for the wire to enter the house. |
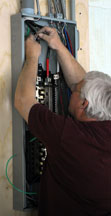
Mike and Kelly installed the exterior electrical box for 600 amp service. |
On the inside,
Tom separated the neutral (white), ground (green),
and hot wires, then screwed them in place. |
Tim Connell then screwed on a metal cover. |
 |
 |
 |
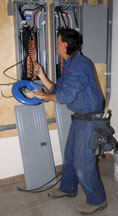
| An assistant and James Goad prepared a separate panel for the battery backup. |
 |
 |
 |
 |
|
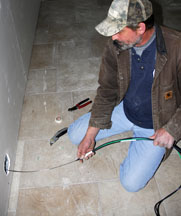
Steve Vaughn pushed through wire |
. . . as Tom pulled it through the conduit on the
other end. |
 |
 |
 |
 |
 |
|
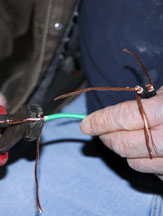
To install the 220 line for the 50 amp range receptacle,
Tom divided and cut the copper strands of each #8 wire to make them
smaller, inserted them into the loop of the fish tape, twisted and taped
them, then pushed it through . . . |
. . . while Kelly pulled the fish tape and reeled
it in as it came though the conduit on the
other end at the panel. |
 |
 |
 |
 |
 |
|
|
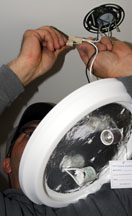
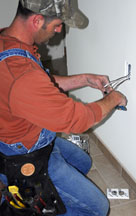
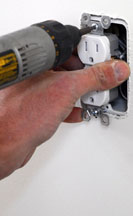
Johnathen Newport installed lights . . . |
. . . while Clint Moles installed plugs. |
 |
 |
 |
 |
|
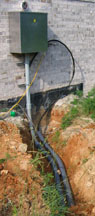
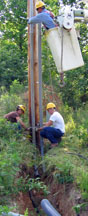
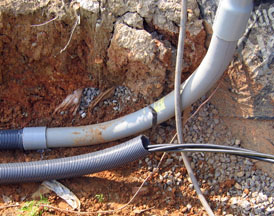
The 600 amp service was connected to the main box as two lines
encased in flexible conduit 30" below ground level. The ditch was dug
deeper where it crossed a water line because it had to be 12" below the
water line. After the wires were in place and the conduits were glued
together, they were covered with 12" of dirt, then wide red plastic tape
was run over them as a warning to future excavators, the phone cable was
placed in the ditch, then the ditch was filled. The black phone cable
(from the green box on the right) had to be 12" away from the electric
line so it ran around the pole, before being placed a foot above the
conduits. |
Link to footer and slab construction.
Link to ICF wall construction.
Link to construction of second floor.
Link to construction of walls of second story.
Link to ICF roof construction.
Link to stovepipe installation.
Link to insulated rubber roof installation.
Link to the window and door
installation.
Link to steel framing.
Link to steel stairs installation.
Link to brick laying.
Link to overhang installation.
Link to gutter installation.
Link to plumbing installation.
Link to septic tank installation.
Link to sheetrock/drywall
installation.
Link to mudding / sheetrock finishing.
Link to painting of the walls and ceiling.
Link to the installation of the floor tile.
Link to the installation of the flexible solar panels.
Link to the installation of the exposed aggregate driveway.
Back to the ICF main page.
Web page and photographs by Carol
Ventura in 2009 - 2010.