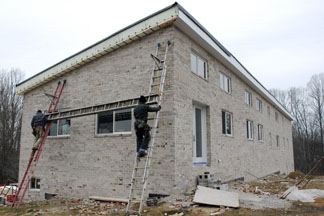
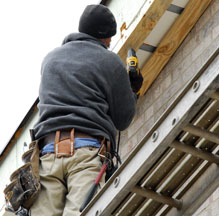
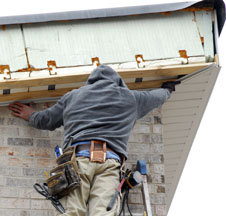
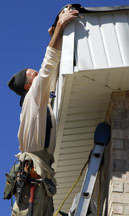
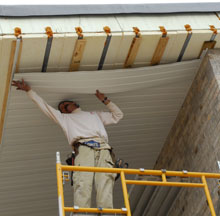
| The vertical and horizontal parts of the overhang were covered with aluminum soffit by Eddie Pharris and his assistant, Robert Greene, of American Vinyl Siding. | |||
 |
 |
 |
 |
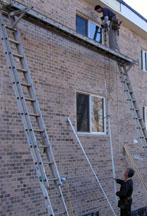
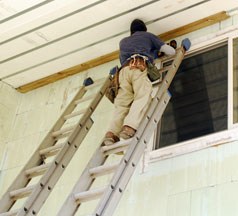
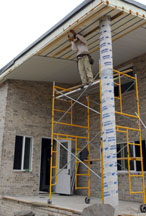
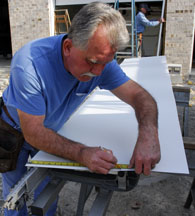
| A portable ladder jack system allowed them to reach the overhang. The trim, soffits, and 12' x 1/2" aluminum J channel were lifted with a rope. | Eddie slid flat .024 aluminum into a brake, then bent it 90o to form the trim. |
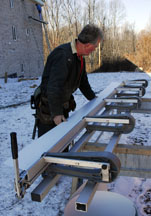
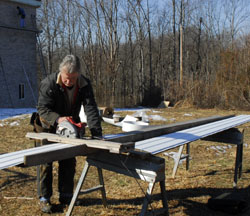
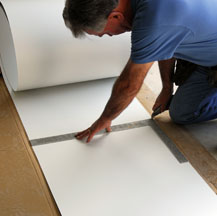
Eddie cut aluminum panels to size from 12' soffit with a veneer blade set into a Skilsaw that slid between wooden rails to keep it square. | |
 |
 |
 |
 |
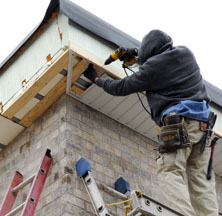
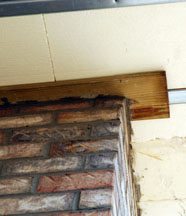
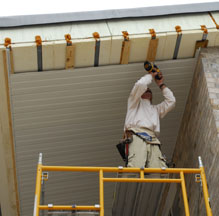
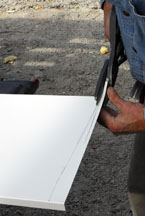
| Robert drilled 1/8" pilot holes through the 1" x 4" pine lathe and metal studs to attach the lathe with 2" exterior screws. | The lower fascia lathe was screwed to the edge of the outer soffit lathe because there was nothing secure to screw into on the bottom of the fascia. | The corners were especially challenging since the overhangs varied in width and were not level. The aluminum soffit panels were set in place for fit, marked with a pencil, cut to shape with tin snips, slid into the 12' long, 1/2" wide J channel, then nailed in place with 15 gauge 1 1/4" textured head stainless steel ring shank moulding and trim nails. | |
 |
 |
 |
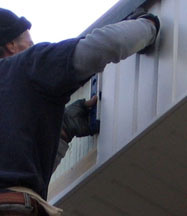 |
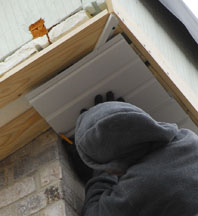
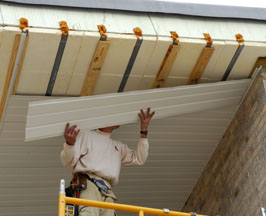
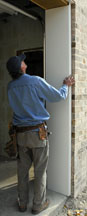
| The J channel was set in place, then nailed to the lathe. | Robert positioned the panel, nailed it in place, then installed the fascia. | Robert screwed 1" x 4" pine to the bottom and top of the fascia, then nailed J channel to the lower and upper edges. | Robert slid the panels into the J channel, but only plumbed the vertical panels with a level before nailing them to the lathe. |
 |
 |
 |
 |
 |
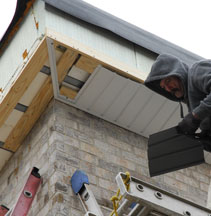
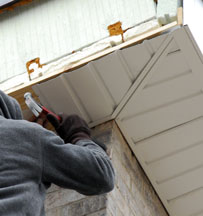
| Robert covered the corners by sliding an angled piece into the upper and lower J channels. | Some overhang had nothing to screw into, so Robert secured the wood to the concrete (through the foam panel) with Tapcons. |
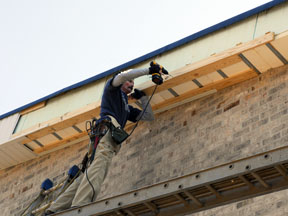
To avoid using Tapcons again, Robert screwed a pressure treated 1" x 6" board to the metal stud in the ceiling at the edge wall before the brick was laid so that he would have something secure to screw into when attaching the ceiling panels. A 1" x 4" pine lathe was attached to every other metal stud (that was embedded into the foam roof panel). Robert held the board in place, drilled a hole, then inserted an exterior screw to secure them. |
||
 |
 |
 |
 |
| Robert then screwed the J channel to the lathe, measured the panel length needed, inserted the panels that Eddie cut to fit, then screwed the edges of the panel to the lathes. The porch ceiling was installed in two sections since the panels were only 12' long. | |||
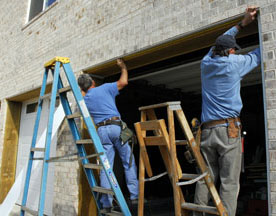
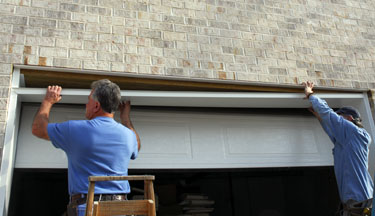
| Eddie and Robert also flashed the garage door openings with aluminum. | ||||
 |
 |
 |
 |
 |
| Eddie measured, then cut each section with a box knife from a roll of aluminum. | Eddie marked with a pencil where the bends should be on both ends of the aluminum. | Robert caulked a corner while Eddie bent the metal. | Robert trimmed the bottom with shears to fit the sloped floor. | A perfect fit! |
 |
 |
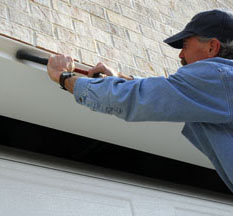 |
| An angled piece backs the corner joint. Accurate measurement was essential. | The flashing was moved into position, then secured with stainless steel nails. | The lip was burnished into position with the back of a hammer. |